Showing posts with label recipe. Show all posts

Sunday, March 1, 2015

Caramel Iced Coffee Concentrate Recipe


I love iced coffee. Maybe love isn't a strong enough word here. Let's just say that if money were no object than I would go to Caribou every damn day and get myself one. Yum! Kind of like Mary-Louise Parker's character in Weeds who has a to-go cup of the delicious nectar from the addictive bean practically glued to her hand at all times. That would be me...only less stoned.


Image from: http://wholehealthdesigns.com/2011/07/coffee-diet-coke-and-nancy-botwin/

If you enjoy twisted shows where the "heroine" constantly makes poor life decisions yet is somehow adorably lovable and entertaining at the same time...you should watch Weeds. Seriously. Jenji Kohan has got that genius on tap! Love her.

Back to the subject though...Iced Coffees. In April 2013 someone had shared a recipe for this decadent sludge on Facebook and I had to give it a try. It was so good that I saved the recipe for future use. I decided to make another batch up yesterday and went over to my laptop to see if I could find the original recipe link so that I could Pin it. Not much luck. All I know is that it may have started out as a modified Pampered Chef recipe. So, all I can say is that I didn't invent this recipe but I did make an optional modification to it and took nice pictures. The only Pin I could find used a stock photo of coffee and the web link went to a dead website and was created only a year ago so, I'm calling dibs. Ha! Here it is:

Caramel Iced Coffee Concentrate Recipe

Ingredients:


1 1/2 Cups Sugar
2 Cups Water
1 Cup Instant Coffee crystals
1/2 Cup Caramel Sauce
1 tsp. Vanilla extract
1 tsp. Flavor extract of choice (optional)


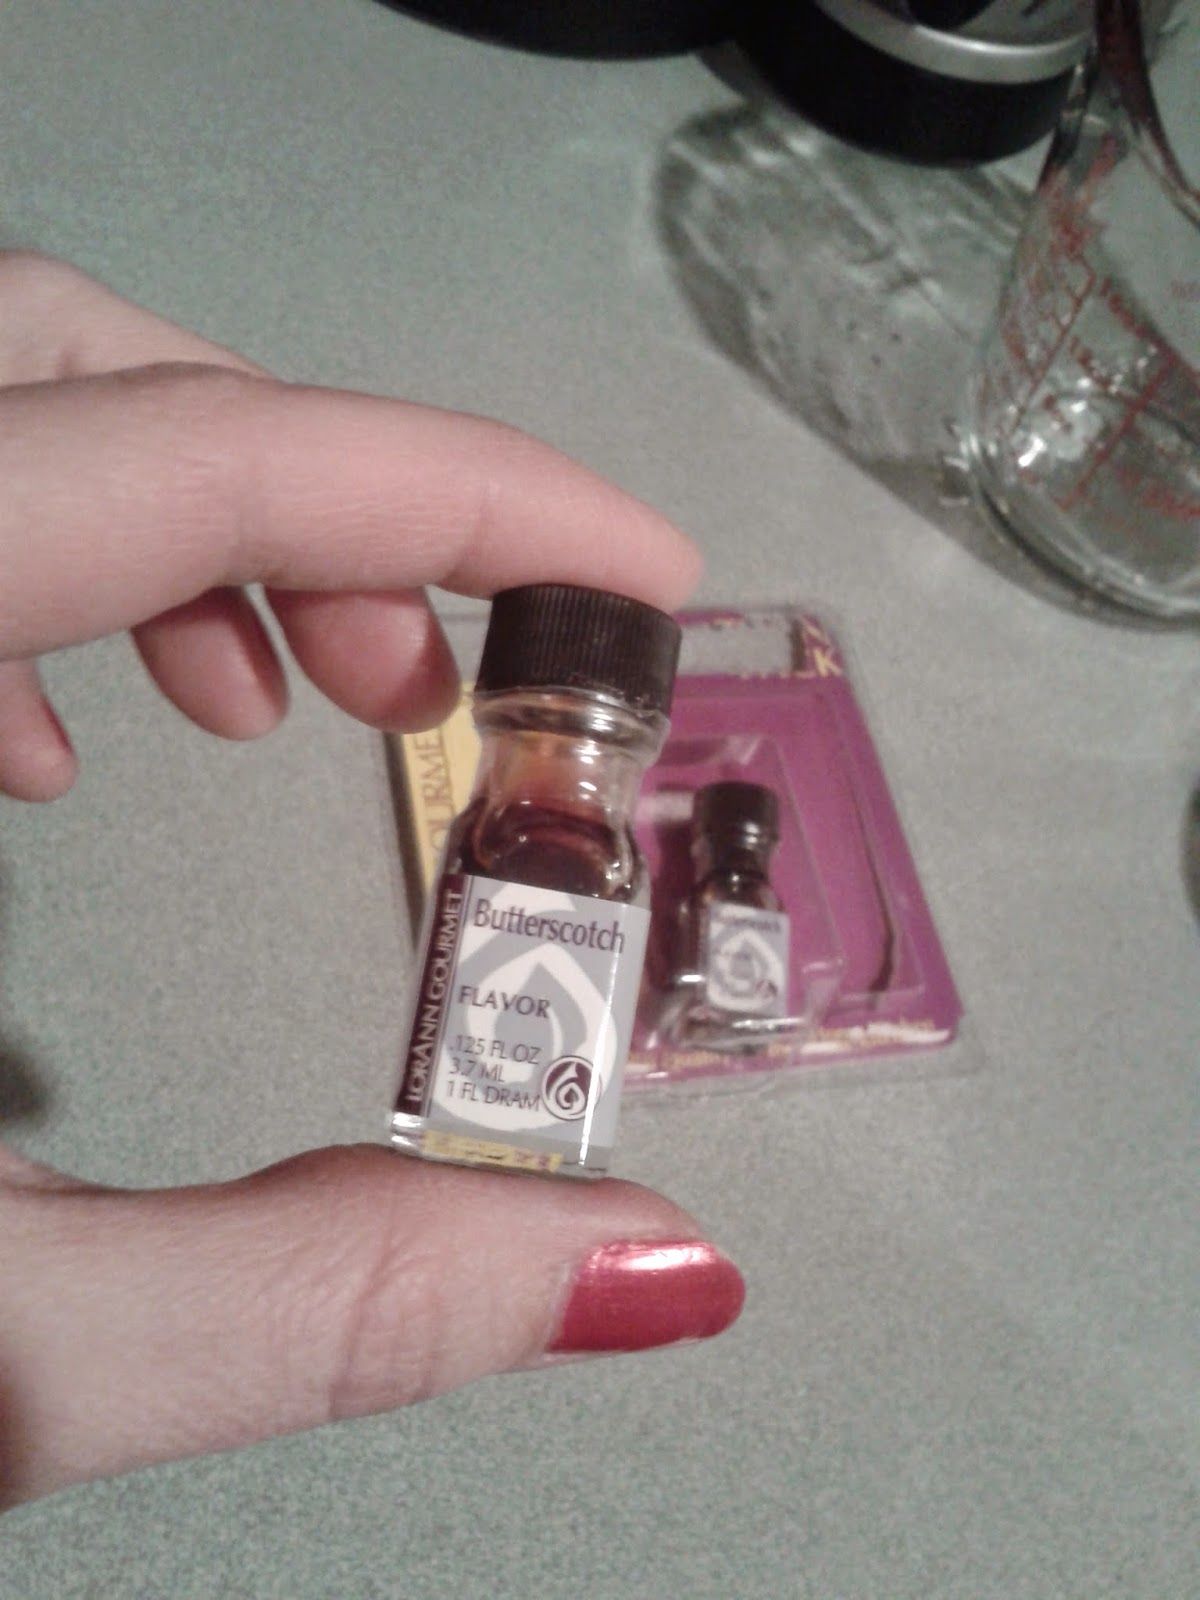
I decided to add a dram of this Butterscotch flavor extract to my batch last night. I imagine many flavors would be available and tasty. Think cinnamon, hazelnut, chocolate and so on. And even if you don't use any at all the coffee drink will still be super good. This was the first time I even tried the extra extract. Do what you like.

Directions:

Bring all of the ingredients in a saucepan to a boil. Allow to cool completely. Store in the refrigerator in an airtight container.

When ready to enjoy, mix 2 Tbsps of concentrate with 8 ozs of milk. Pour over ice and enjoy!

Like yours a little stronger? Just add a little extra concentrate. So easy. So tasty.


I love that I can just go to my fridge and get a Iced Coffee without leaving the house or breaking the bank. Every little bit helps the budget when you are raising five kids, right? I hope you have a relaxing Sunday and thanks for stopping by!


Thursday, September 4, 2014

Bulk Breakfasts for Your Back-to-School Kids

School is back in session, full swing. We, as parents, are crazy busy and anything that makes the mornings run smoothly is a win-win situation. I would like to share with you something I tried out last year that went very well. Today I decided to do it again.

Now, in my home I will admit that most mornings we do cold cereal and milk. You know, the good ones, the sugary ones, the ones in the bright colored boxes and bags. My kids love them. I know I aspire to be a super mom so please don't judge. Ha! I cook for my kids all of the time. Healthy balanced meals and all that jazz. I can be quite strict about it actually. But for breakfast, most of the time, I let them have a little fun. Sometimes they want a little something more, though. With five kids all getting up and eating at different times throughout the morning, dragging my tired butt outta bed to make a big fat breakfast for the whole fam damily just isn't in the cards for me. So, here we are.

A couple hours tops and you can make home cooked breakfast foods that are super fast and very easy. You can serve your little ones within minutes or the bigger kids can get it for themselves. Who doesn't want that?!

Today I decided to make French Toast and Egg-A-Muffins. I will probably get to a couple batches of banana pancakes later today also. I did not invent these recipes, obviously, but I did name the egg one for myself because I have no idea which website my dear hubby got the original recipe from in the first place. He found it back when he was on a P90X kick a couple of years ago and I thought these were down right genius.

For the French Toast you will need eggs, bread, a splash of milk, a dash of salt and some cinnamon. You will need approximately one egg for every two slices of bread. Today I used a dozen eggs and was able to make twenty five slices of French Toast.


Beat together all of the ingredients, except for the slices of bread, in a shallow container. Dip each slice of bread, coating both sides of the slice with the egg mixture and place on a greased or non-stick pan (I prefer to use my electric skillet for these). Heat until cooked through flipping them each once.


Allow the slices to cool completely and place them in a freezer safe zip lock baggie or airtight container of your choice.


The kids can take out a couple slices in the mornings and put them right into the toaster. So easy. My kids like syrup on theirs. But, when my kids were little I didn't allow them to have syrup yet so I would spread a thin layer of applesauce or any of their fruit jarred baby foods. They all loved it.

I used white bread today because that is what I happened to have in the cabinet. If you are looking for a slightly healthier option, use wheat bread instead. If you want it to be an extra special savory treat, use cinnamon raisin bread. It is so tasty. I pick up a loaf whenever they are on sale at the bakery of my local grocery store.

And now the Egg-A-Muffins! Yummy! You have your protein and possibly dairy and vegetable groups covered with this one. I find it easiest to do at least a dozen at a time. For this you will need a dozen large eggs, a splash of milk, a little salt and pepper and then any meats, veggies and/or cheeses of your choosing. Today I used diced ham, onion and shredded mozzarella.


Beat together the eggs, milk, salt and pepper. Add the diced meat and vegetables if you are using any. Using a 1/2 cup measuring cup, scoop and pour the egg mixture into a greased muffin pan (do not use paper liners). Be sure to scoop some of the meats and vegetables into each one as they can sometimes sink to the bottom of the bowl.


Sprinkle one or two tablespoons of shredded cheese onto the top of each one. I highly recommend placing your muffin pan onto a cookie sheet just in case any egg batter dribbles over the edges. I really hate cleaning out my oven. Bake at 350° for 40 minutes. The tops will be nice and round and golden delicious.


When they are done, allow them to cool completely and then place them into a freezer safe zip lock baggie, same as the French Toast.


When you are ready to enjoy one (or two or ten), just microwave one for 45 - 90 seconds, depending on if they have been thawed out or are still frozen. Again, so easy!


What I especially love about this recipe is that the filling choices and combinations are endless. Sausage, crumbled bacon, ham, peppers, onions, all the different kinds of cheese. Have fun with this one and make what you like.

So, now I am off to do the same with banana pancakes. My kids can pop them right into the toaster too. I hope you found this helpful and that your kids enjoy some hearty home cooked breakfast foods every once in a while! Love all around!


Tuesday, August 5, 2014

Best Ever Coleslaw Recipe

I am kind of a snob when it comes to coleslaw. I hate everyone else's coleslaw but mine. Well, when I say "mine" I mean the coleslaw I was raised on. My Grandmother (rest in peace) made it for my Dad when he was little and he, in turn, made it for us. It is my favorite coleslaw EVER and everyone who eats it here, loves it too.

The great thing about coleslaw is that it goes with so many different foods. If you are looking for that perfect yet simple side dish for dinner or a potluck, look no further. This may turn out to be your go to food.


Best Ever Coleslaw Recipe

Ingredients:

1   16 oz bag tri-color coleslaw (or you can shred your own head of cabbage, green, red or both)
1 - 1 1/2  cups mayonnaise
3/4   cup sugar
3 Tbsps   cider vinegar

1. Place the slaw into a large bowl, preferably one with a lid.

2. Add the mayo, sugar and vinegar. Mix very well.

3. Taste it to see if you would like more mayo, sugar or vinegar. Add some if you do, little by little.

4. You can eat it right away but I prefer to cover it and place it in the fridge for at least 15 minutes or so, sometimes longer. It will get a little soupier and the flavors will incorporate better. Give it a good stir just before serving.


I make sure to use it up within a day or two, keeping it refrigerated in the meantime. If you like onions, try adding a small amount of finely chopped white or red onions. It's pretty darn good that way, too. Gives a nice little bite to it.

Happy eating! Let me know if you give it a try.


Sunday, August 3, 2014

Fresh Salsa Recipe

Mexican food and I are BFFs. I can't get enough and the more authentic, the better. I probably cook something Latin themed once a week; be it tacos, nachos, enchilada lasagna or what have you. Tortilla chips and salsa have been a staple in my home for at least twelve years. My second job, as a teen ages ago, was at a local Mexican restaurante that is no longer with us, Chi-Chi's. Not authentic really, more Tex-Mex style, but that doesn't bother me. I am an equal opportunity enjoyer of foods originating South of the border.

So, let's talk salsa. We were going through a ton of salsa, buying it every time I went to the grocery store. My husband and I decided to try making our own and it turned out delicious. We never buy jarred anymore. If there is a jar of salsa in my home, someone else brought it over. The homemade stuff is just too good, has no preservatives and we feel is slightly more cost effective. We took what we knew about salsas and combined it with with my experience from watching salsa being prepped at Chi-Chi's and this is what we came up with.


Fresh Salsa Recipe

Ingredients:

1   10 - 14.5 oz. can of diced tomatoes with green chilies
3 - 4   Roma tomatoes (or tomatoes of your choice)
1 - 2   medium onion(s)...We usually have yellow onions around but white or red would be tasty               too.
1/3 - 1/2   of a bunch of green onion
1/4 cup   chopped fresh cilantro
1/4 - 1/2 cup   sliced jalapenos, depending on how spicy you like your salsa (I used jarred jalapenos                       but you could use fresh ones, making sure to remove the stem, seeds and veins.)
1 Tbsp.   sea salt
2 Tbsp.   minced garlic

1. Pour the can of diced tomatoes into the blender.

2. Quarter the tomatoes and onions and add them to the blender along with all of the other fresh ingredients. I layer mine just a little.

3. Add the jalapenos, garlic and salt.

4. Blending speed will be up to you. Some people like their salsa chunkier and some like it soupier (That's a word, right?) I personally prefer mine a little chunkier so I use the pulse blending feature in order to have more control. I watch to make sure the veggies are getting pulled down into the blades. If they are not, I take the pitcher off the motor and give it a couple good shakes to mix the liquid and the veggies better and then pulse blend again until it is the consistency I like.

5. Now dip a chip in it and see what you think. Mmm. Good, huh?


That is basically it. I pour mine directly into an airtight container. You can keep this salsa in the refrigerator for up to 4 days. Although, you may not have any left by then. (Insert wink here.)

You may have noticed something about my recipes, which are a new addition to my blog. To me, cooking is playing. I understand that when you are baking something it is important to stick to specific amounts of ingredients, like baking soda and such because some of those ingredients have very specific jobs or cause needed reactions that are imperative to having a cake, or what have you, turn out just right. When you are cooking, there is much more room for playing or improvisation. This is where cooking gets fun!

I won't always give you strict guidelines and amounts for ingredients. Only you will now if your family loves more cheese or more sauce or less green peppers. Cooking doesn't have to be hard. Recipes aren't the end all or be all of the food world. Get into the kitchen and play. You might just be pleasantly surprised at what you can come up with. And if it doesn't turn out any good...order a pizza and try again tomorrow ;-)

Love, hugs and other good stuff.


Friday, August 1, 2014

Easy Peasy Mini Pizzas Recipe

MY KIDS LOVE PIZZA!!! My Mom used to make us these mini pizzas when my five brothers and I were kids and I have been making them for mine since they could chew. This is one of the easiest dinners I make for them and goodness knows I love easy!

You can play with the ingredients for this recipe to make your family happy. Topping choices are endless and only you will know which veggies and meats your child(ren) will eat. Make the pizzas your own and have fun with it. Your kids would probably love to help you out in the kitchen, too.


Easy Peasy Mini Pizzas Recipe

Preheat oven to 350°

Ingredients:

1  pack of English muffins (6 count)...I really like the Sourdough ones but any will do.
1  14 oz. can or jar of pizza sauce
12 - 18 ozs.  shredded cheese of your choice
Any toppings you choose (optional)

** Note: If you are using meat, cook it up before hand. For example: ground beef, grilled chicken, Italian sausage, etc. If I am using ground beef, I brown one pound and season it to taste, sometimes adding minced garlic or diced onions, oregano and so on. Whatever I fancy that particular evening.

1. Open all of the English muffins and lay flat on a baking sheet, 12 pizzas total.

2. Spoon sauce evenly onto each English muffin.

3. If you are using any meats or veggies, add them now :-)

4. Pile 2 - 3 tablespoons of shredded cheese onto each pizza.

5. Bake in the oven for @ 10 - 15 minutes or until cheese is melted.


So easy! Sometimes I like to do a BBQ chicken version. Instead of pizza sauce you can use BBQ sauce. Add grilled chicken and garnish them with chopped cilantro and red onions. It is amazing!

Have fun in the kitchen with this one and please feel free to comment or share with me when you do! Peace.


Monday, July 28, 2014

Kielbasa & Ranch Potatoes Recipe

All of my kids love Kielbasa. I was bored of just simmering it in water and serving it with the same old sides all of the time so, I decided to come up with a better way to cook it that would make me happy as well. I do that, ya know. I make stuff up. I stare at my cabinets until something just comes to me. Frequently. Ha!


Kielbasa & Ranch Potatoes Recipe

Ingredients:

13 - 16 oz Kielbasa (or polish sausage, turkey kielbasa, whichever one you fancy...or have a coupon for...)
4 medium potatoes (again, your choice of potato, I get whatever is on sale)
1 cup frozen or 1 can kernel corn
1 medium onion
1 cup diced bell peppers or sweet peppers (any color, but I hate the green ones)
1 Tbsp. minced garlic
3 Tbsp. cooking oil
1 pouch Ranch seasoning powder

1. Heat cooking oil in skillet or pan. (I prefer my electric skillet for this dish)

2. Wash and then cut the potatoes into bite sized pieces (I leave the skin on for the nutrients) and put in the pan, add the minced garlic and give them a quick stir to coat in oil.

3. While the potatoes begin cooking, dice the onion and bell pepper. Add them to the pan along with the corn.

4. Cut the Kielbasa into bite sized pieces and add to the pan.

5. Sprinkle the Ranch powder over it all and stir it well to coat evenly. 

6. Cover and simmer at @ 325° and stir it occasionally for about 20 minutes or so, just until the potatoes are cooked to your liking. (Some people like theirs softer than others)

Makes @ 6 cups or so.

My kids like to have ketchup on theirs. I like mine with some shredded cheese on top, usually cheddar or colby jack. Maybe even a dash of Red Hot Sauce. This dish is a family favorite. I hope you and yours enjoy it, too!

Happy cooking!


Saturday, July 26, 2014

Perfectly Sticky White Rice Recipe


I love sticky white rice. I made some to go with the Sesame Ginger Chicken & Carrots I made for dinner this evening and I got to thinking about how long it took me to learn how to cook it just right. I failed a few times and ate some I wasn't happy with a few more times than that. I do not own a fancy rice steamer or anything. I thought about it in the past but decided that I don't cook rice enough to make the expense worthwhile. So, it was me, my sauce pan and practice.

Part of my problem is that I like to buy the real jasmine rice. I find it in the foreign foods section of my local grocery store or from random local Asian food markets.


There are not always cooking instructions on these bags and I have even had a few bags that didn't have any English wording on them at all. So, here I am, saving you the trouble of trials and errors. Whoopie!

Perfectly Sticky White Rice Recipe

Ingredients:

1 cup Jasmine Rice
2 cups water

1. In a medium sauce pan with lid, stir together the rice and water. (I prefer non-stick pans here)

2. Heat to boiling while uncovered and then stir again.

3. Cover and reduce heat to very low, barely a simmer.

4. Leave it alone. Less is more when cooking sticky rice. Do not stir it. I know it's hard but seriously, put that spoon down. And maybe don't lift the lid a million times like I used to.

5. Simmer for @ 20 - 25 minutes or so. Keep an eye on it until you do not see water bubbling up around the grains anymore. 

6. When you no longer see water, remove from heat and leave covered until ready to use.

This will yield about 3 cups when fully cooked.


That is it. Pretty easy. I try not to stir it too much after it is done cooking in order to help retain the sticky. If you want it to look neat, try scooping the rice onto plates using an ice cream scooper. Gives it that cute rounded top.

I keep mine stored in an airtight container, like this:


I also make sure that my measuring cups are completely dry before scooping out any rice. Introducing moisture could lead to mold so it's better to be safe.

Thanks for stopping by and feel free to let me know when you try this out and how it works out for you. Peace!

Ginny's Fantastical Zucchini Craisin Bread Recipe

Good morning World! Adding recipes to my blog was on my To-Do list so, here is my first one. Enjoy and please let me know if you try it out...especially if you like it.

Ginny's Fantastical Zucchini Craisin Bread Recipe


Preheat oven to 350°

Ingredients:

1 1/2 cups flour
1 tsp. ground cinnamon
1/2 tsp. baking soda
1/2 tsp. salt
1/2 tsp. ground nutmeg
1/4 tsp. ground cloves
1/4 tsp. baking powder
1 cup sugar
2 cups shredded unpeeled zucchini
1 egg
1/4 cup cooking oil
handful of Craisins (up to 1 cup)
1/2 cup of nuts (optional)

1. In a bowl, mix together the flour, cinnamon, baking soda, salt, nutmeg, cloves and baking powder. Set aside.

2. In a separate mixing bowl or standing mixer, combine the sugar, zucchini and eggs until just mixed. Add in the oil and mix again.

3. Add flour mixture to the wet ingredients and stir until combined.

4. Gently fold in the Craisins (and the nuts, if you are using any).

5. Pour the batter into a greased loaf pan @ 5"x9"x3" (or any pan of similar size ie: 8x8, 9x9)

6. Bake in the oven for approx. 55 - 65 minutes or until a toothpick or butter knife inserted comes out clean.

7. Cool for about 10 - 15 minutes and enjoy. (I like mine sliced and covered in butter or spread.)

** Alterations: If you are looking for a heartier bread, try using half white flour and half whole wheat flour.

** Note: I keep mine in the refridgerator, heat up slices in the microwave as needed and use it all up within a few days.


You may have noticed that I use way more zucchini that other similar recipes. As a mom of five kids, I am always trying to find ways to get more veggies and nutrients into their bodies. Hiding them in delicious baked goods works so very well. I do the same with my carrot cake, banana breads and much more. I hope you enjoy this recipe. Feel free to comment about your experiences and/or share pictures on my Facebook page at:

https://www.facebook.com/SuperMomTangerineDreams

Find me on Pinterest: http://www.pinterest.com/ginnylouden/

If you liked this post, you may also like Please DO Hide the Veggies.